Creating a scenery object can be a simple task, but it needs a lot of stages to be done before an .obj file can be saved to X-Plane.
1. Design the object using a CAD software application.
2. Design a texture file to apply to the object.
3. Apply the texture
4. Save as an X-Plane object
5. Test the object in WED to see if it loads to the flight simulator scenery correctly.
Lets go through the designing of a small bungalow using Google SketchUp and Photoshop.
Using SketchUp - with the ruler tool, mark out 8m on the red axis and 5m on the green axis. - use the box tool to put a box on the ground for the house floor.

Using the ruler tool again, mark a 2.1m corner height for the walls and draw a vertical line with the pen tool. Use the box tool to put in the walls, being careful to match the corners exactly.
Use the pen tool to mark a vertical in the centre of the end wall to raise a line to the top of the roof apex. draw lines to the ends of the wall to form the gabel end.
With the box tool at the centre of the other end wall, put a box to the apex of the gabel end that you have created. Use the pen tool to finish off the roof line. This gives you a simple house shape. Give the model with a suitable name (bungalow _1.skp). As always, when you complete one task, save the file to be able to recover it if you make a mistake with the next task.
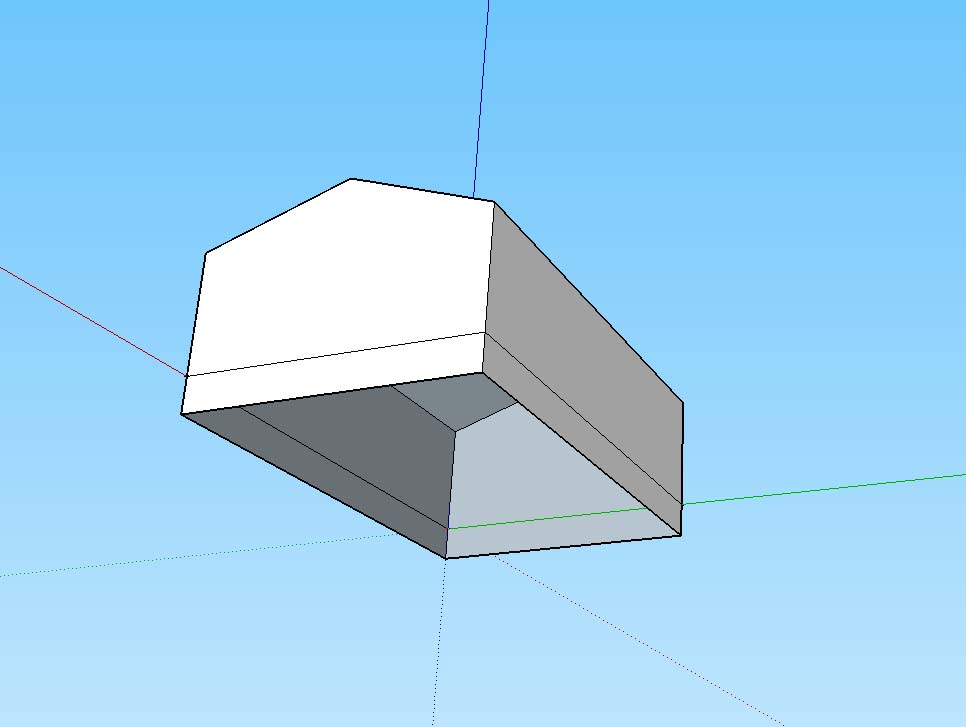
Take the model and rotate it to show the bottom. Add a skirt below the floor level which will stop the building floating in the air if it is placed on an uneven landscape. Remove the floors and extra lines that are not needed and save when you are satisfied that you have what you want. This is the base model.
You will need a surface texture file which can be crearted using photoshop - either from your own design or from photographs. Experience of using photoshop or a similar image editor is essential. The texture file is best saves as a .png file, though bitmap and jpeg files will work. For this, I have pulled out a texture file I used for a previous set of buildings.
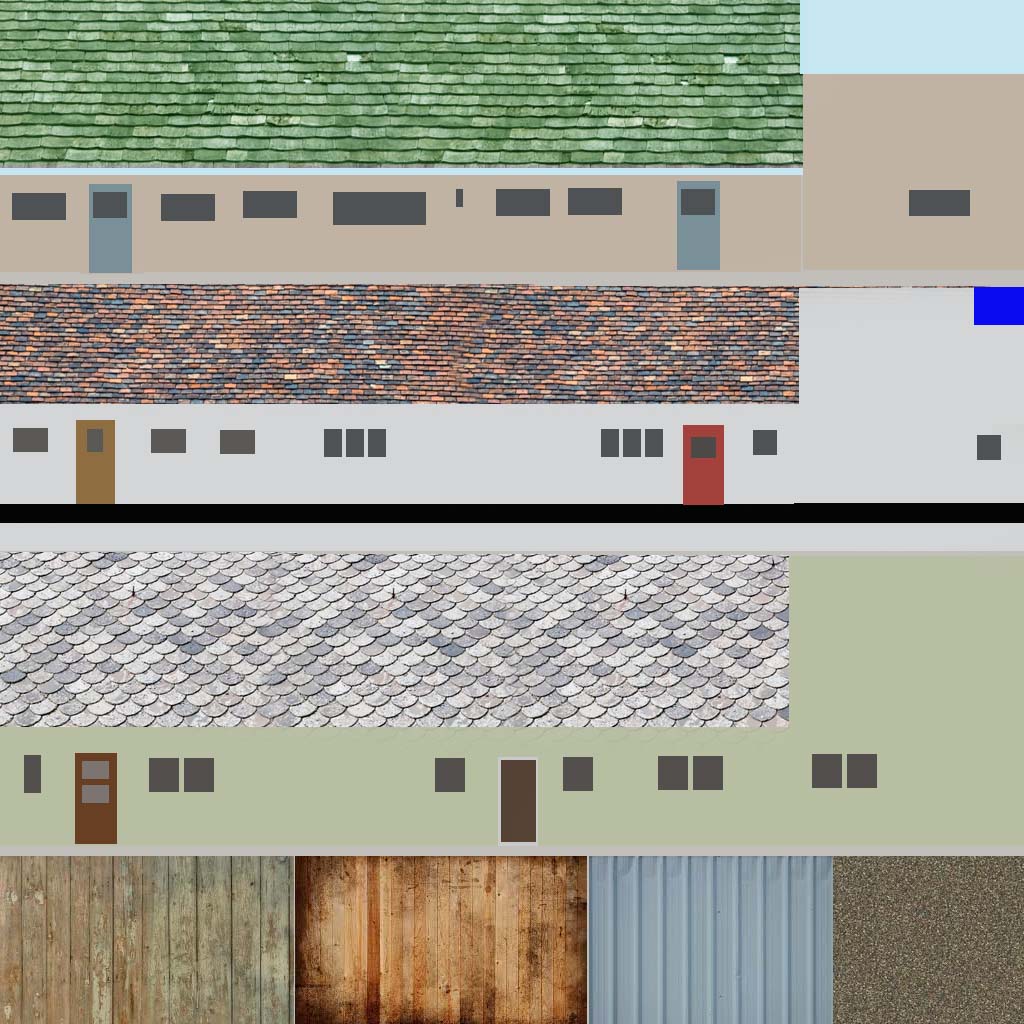
To work on X-Plane, the file needs to be a square in the proportions 512 x 512 or computer file multiples of that size. If unsure, lift a working texture file, rename it, and edit it to your own needs. This particular file needs to be set at 25m x 25m in SketchUp to fit the building without re-sizing. The best colour format to use is RGB 8 bit - at least 72 pixels, which is screen texture. For more detail where lettering is involved, use a larger square or a greater pixel density (200 max)
Save the texture file in the same folder as the base model. Open the base model in SketchUp and load the texture file.
You can texture each surface individually, but I always highlight the whole model and apply texture inside and outside to all surfaces. I then reposition or re-size the texture on each face of the model in turn.
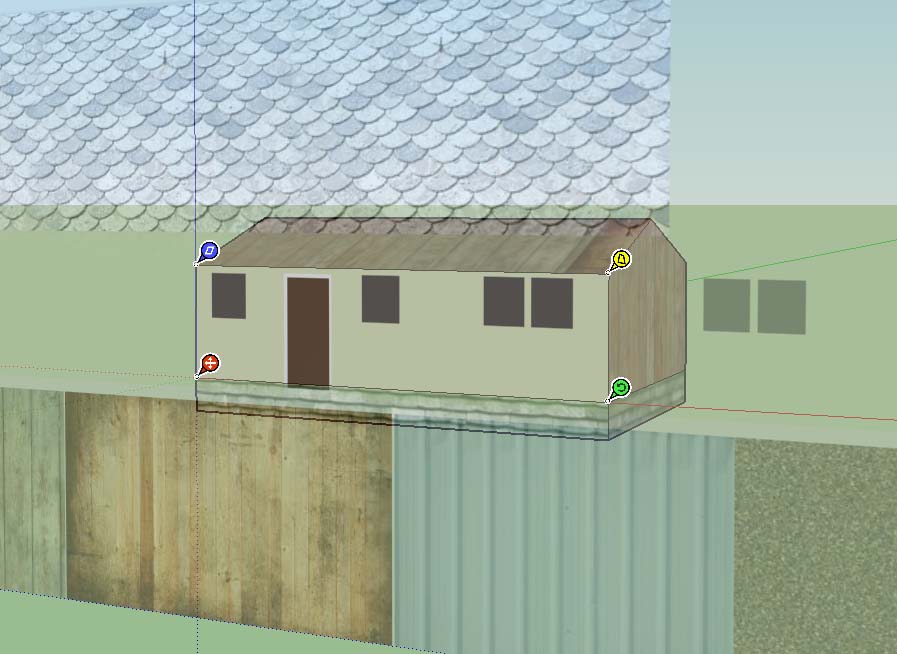
There are 4 texture markers on Sketchup (and most other CAD programs). Click on one marker and drag it to where you want it then click it into place. You can position all 4 markers to the texture area you want to set. The green marker will expand and rotate the texture. The blue marker will elongate the texture, etc... Right click the surface to adjust texture. Click on the pointer tool to move on.
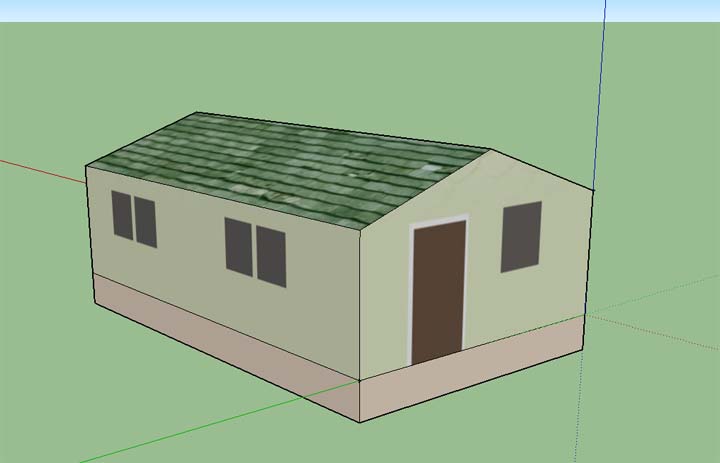
The finished object needs to be saved and then exported to X-Plane to generate an .obj file which can be placed within the flight simulator scenery using WED.
The ground level point is set at the crossover point of all of the axes of the model. In this case at one corner of the building. If you do not specify a ground height, this corner will sit on the ground mesh and the building will be horizontal at that point. If you do specify ground height, it is this point that will appear at a specific altitude above Mean Sea Level (MSL). Specify too high and the buildings will hover above the ground. You can specify too low to shorten the height of an antenna, etc..
It may be more practical to move the axes intersect to the centre of the model floor level if it is to be used on uneven ground.
Examples of building object files to download and examine as a zip folder. These files will download to your computer. They contain sketchup models, texture files and object files that were used on my scenery for San Cristobal.
Top
Tips
Round surfaces are difficult to texture in this basic way. A work around is to put the texture you want on a rounded object in the bottom 50 percent of the texture file and set the file to 50 percent bigger than your base model. The alternative is to reset the markup parameters of the .obj file manually - not a skill that a novice would have. The areas of a rounded object can also be segmented and textured individually.
Keep models as simple as possible to keep the load time down.
Very large and complex building may need to have more than one base model and be fitted together in WED so as not to exceed the file size limit for objects in X-Plane.
.