A problem that perplexes many inexperienced developers is the placing of small scenery items. This is OK when you are building on a designed apron or taxiway. but placing buildings along a default scenery road can be a challange.
Tempoprary grids can help a lot.
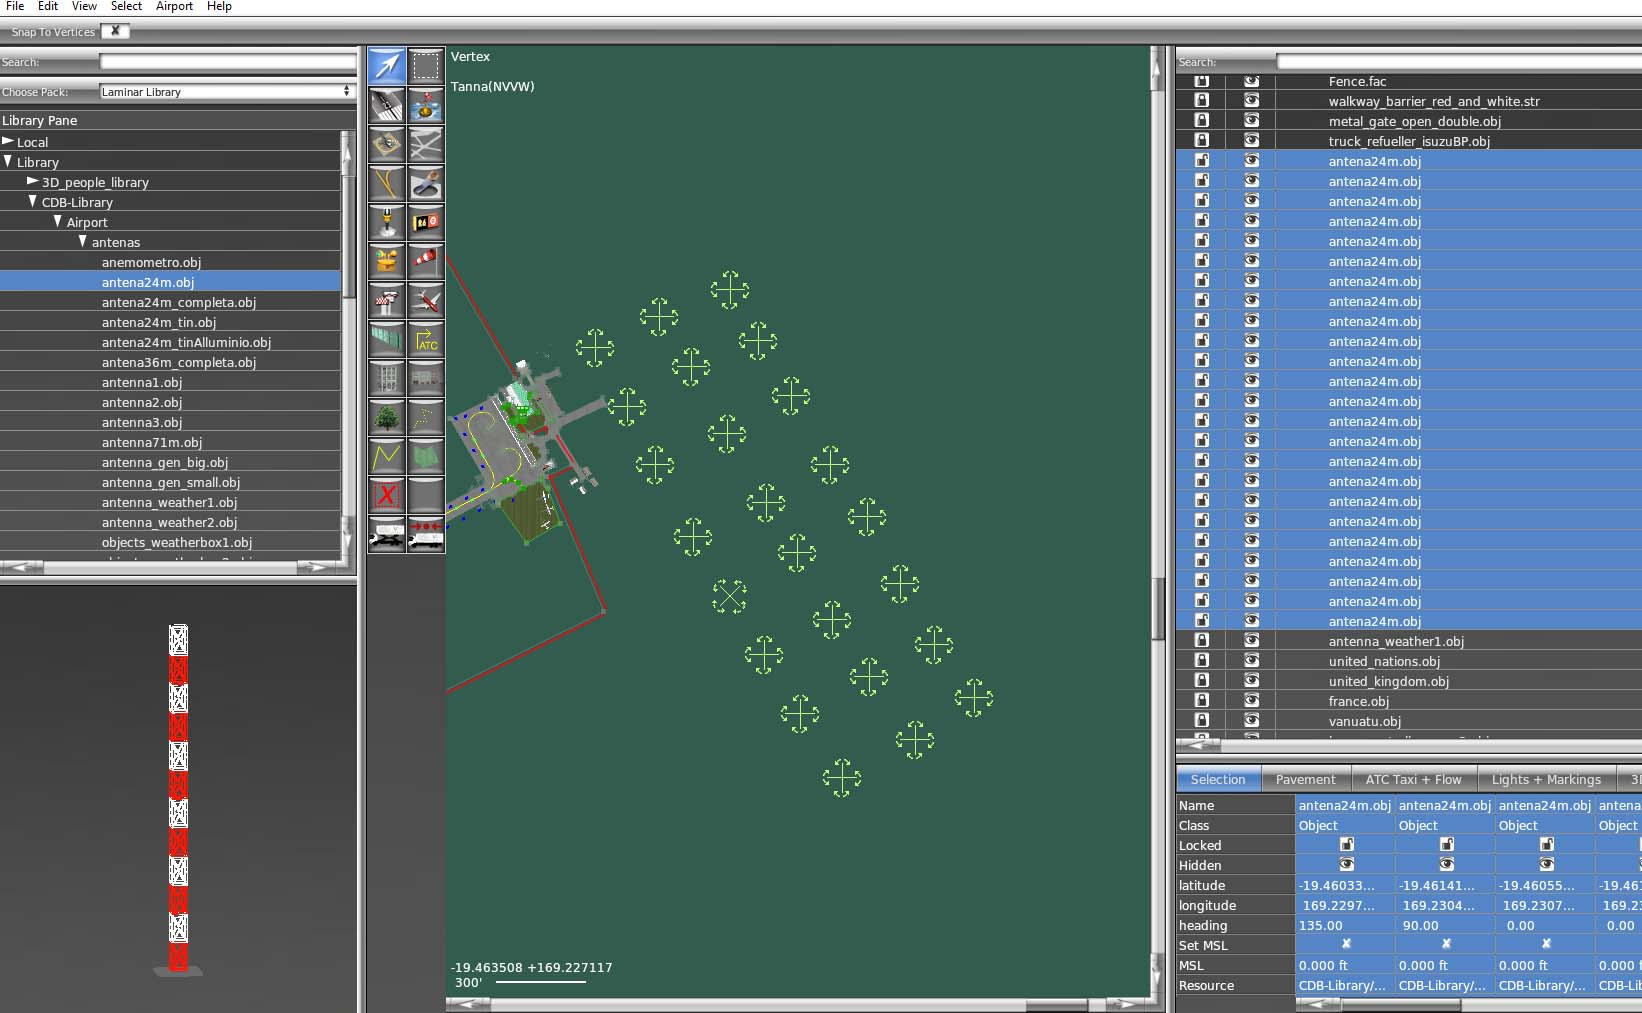
A grid of small antennae can be placed across the landscape near an area that you are working on. This will enable you to compare the temporary grid with the features on the simulated scenery.
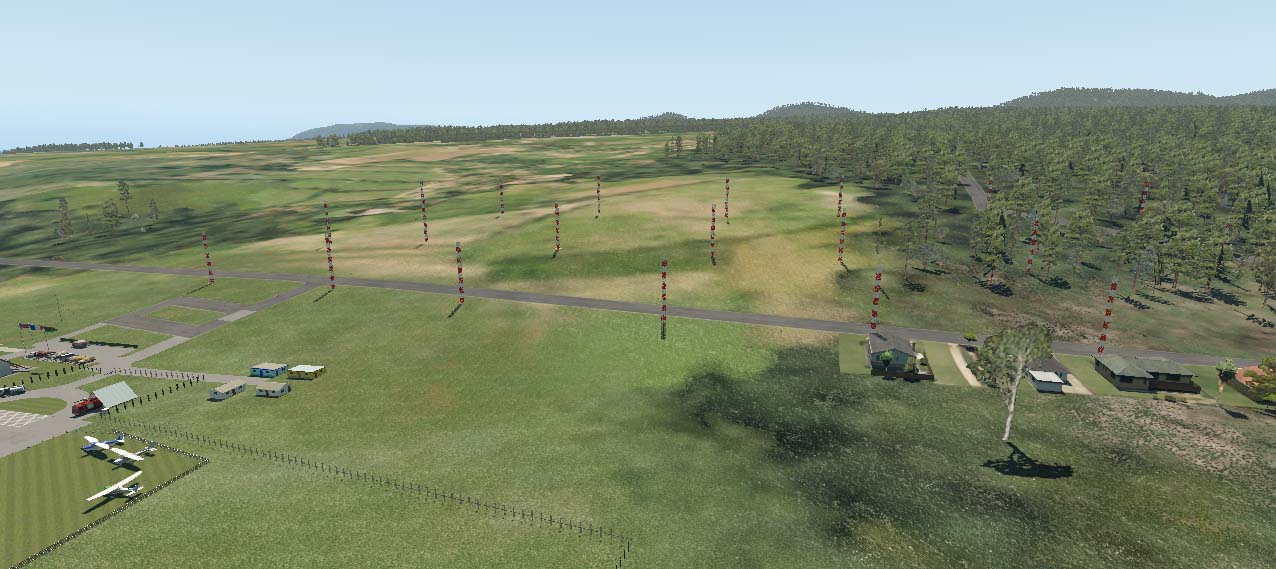
This grid has been placed along the
main road at Tanna Airport in Vanuatu. It can be used to map
out the road patterns on WED to enable the placing of houses.
|
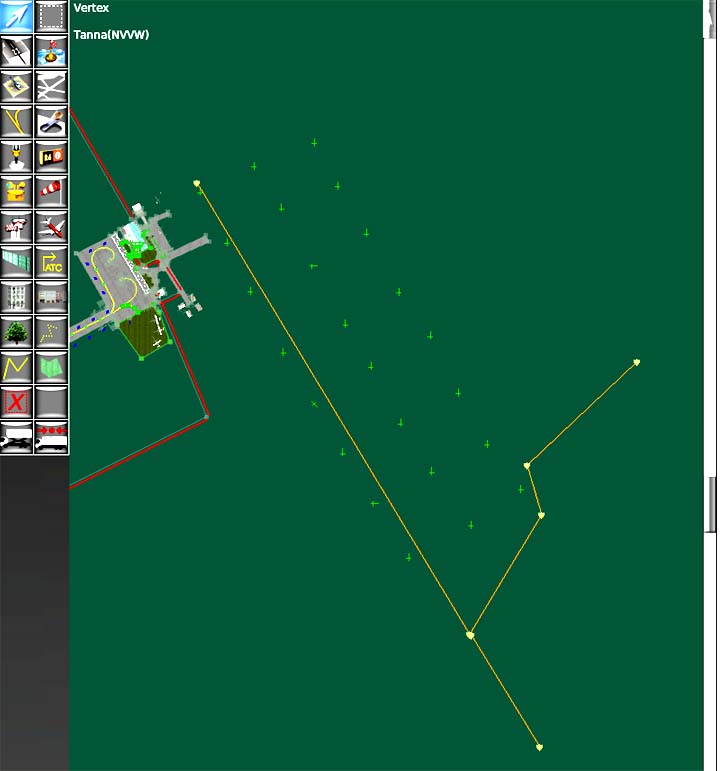
This enables the lines of the road to be drawn on WED in order to make the placing of houses a more simple matter. When the roads have been drawn using the line tool, the antennae grid can be deleted so that it does not get in the way. By having X-Plane and WED open at the same time you can toggle between the two windows. This enables you to place a building or a few items and save the file in WED - Export Scenery Pack - then go to X-Plane and Reload Scenery from the Developer menu. You can then see the changes that have been made and make any minor adjustments. Remember to delete the guide lines when they are finished with. If you are working with street grids, it is often easier to place one block carefully, then just guess the approximate positions of the next block, have a look on X-plane, then tweek the positions to a better fit. Practice and experimentation will eventually allow you to work out a method that suits you best. |
 |
Top
Tips
Lots of detail close to the runway, taxiway and
apron.
Minimum detail at a distance where the LOD will push the
detail down anyway. Look for landscape texture
rather than precise detail.
Make significant buildings and landmarks stand out close to the airport
or approaches.
.