Creating taxiways requires a little skill in order for them to be used smoothly. They need to fit snugly with the parking pans and runways and have smooth taxilines for the pilots to follow.
Creating
taxiways and aprons in WED should be done selecting the "Taxiway [T]"
tool. Note that taxiways have additional properties of texture
and roughness associated with each selected surface. They are
also recognised as routes for handling AI aircraft, so do not use this
tool for creating car parks or pathways. Standard polygon
textures can be used for those elements of the scenery.
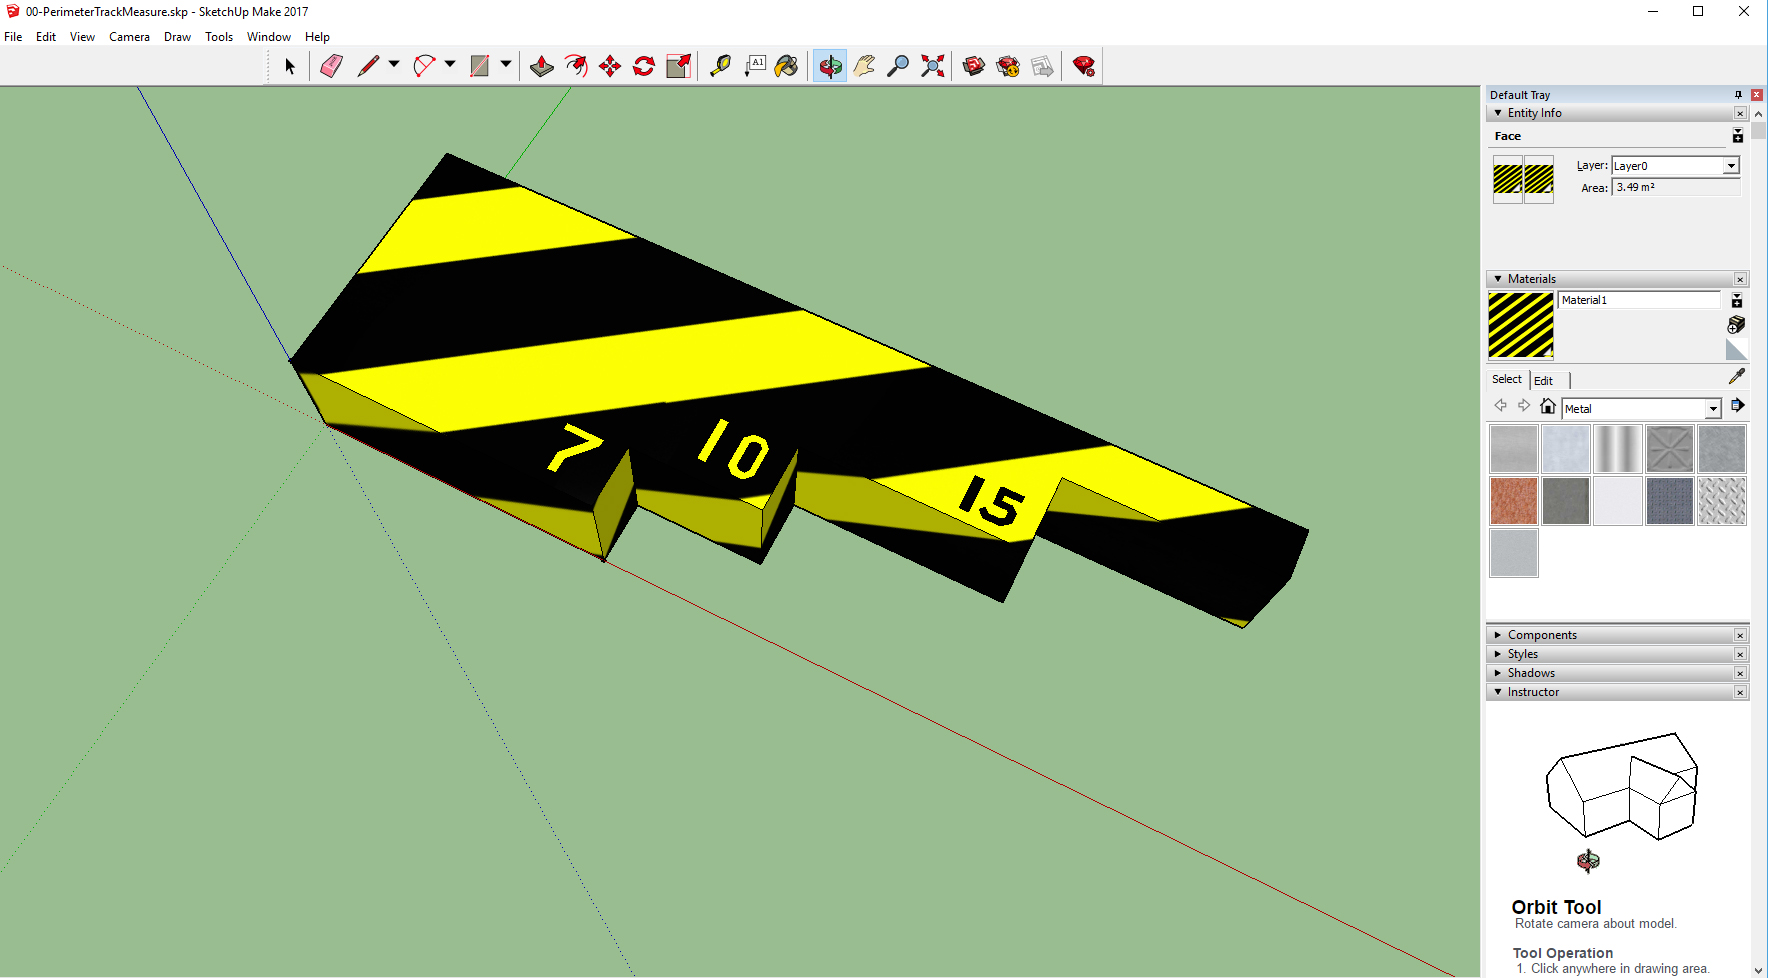
The first and most useful tool is a temporary template that
can be
placed at multiple sites on the WED scenery screen to measure the width
at which to mark out the taxiway. Creating this bit of kit
for your airport design will save a lot
of time and effort.
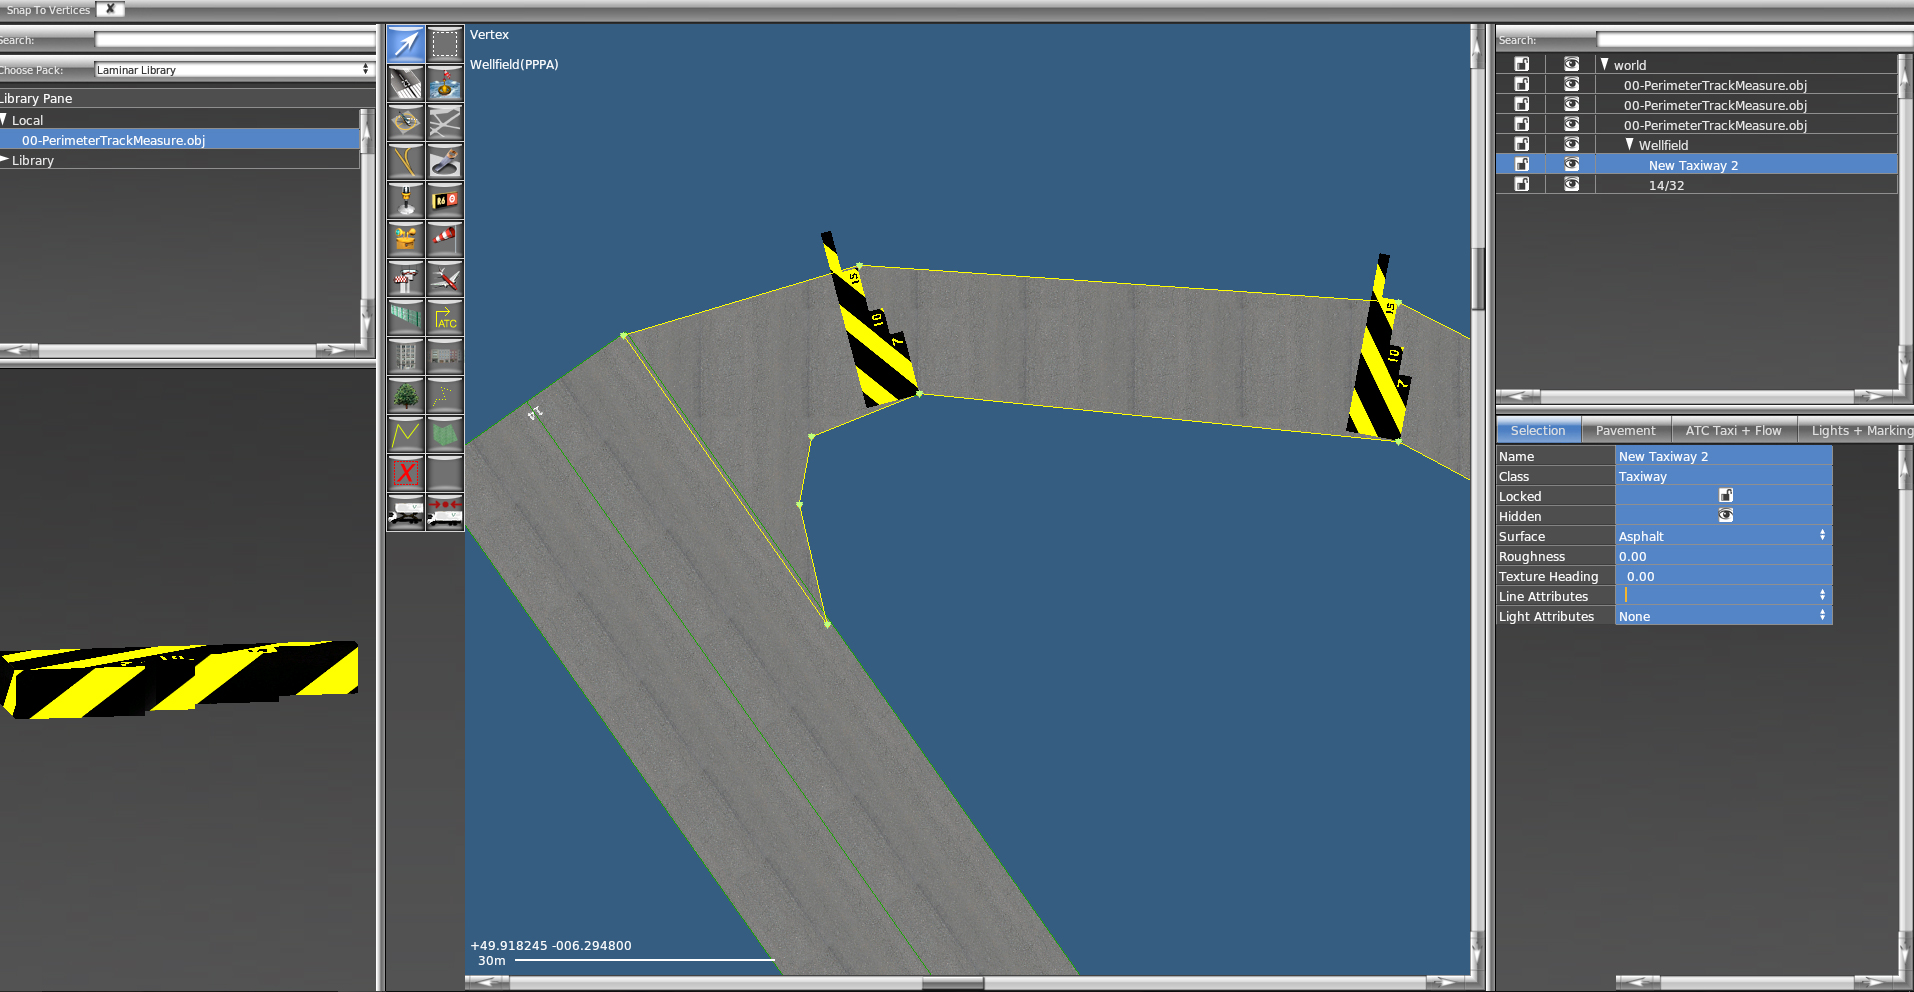
Using
the template tool, mark out the positioned of the taxiway sections -
set the surface and remove the edge lines by deselecting the yellow
line. In this example, the taxiways are 15m (46 foot) wide.
That
size will accomodate most aircraft. Give each taxiway a
sensible
name so that you can find it to edit the scenery as
needed. Save
the file before proceeding (just in case you mess up on the next stage)
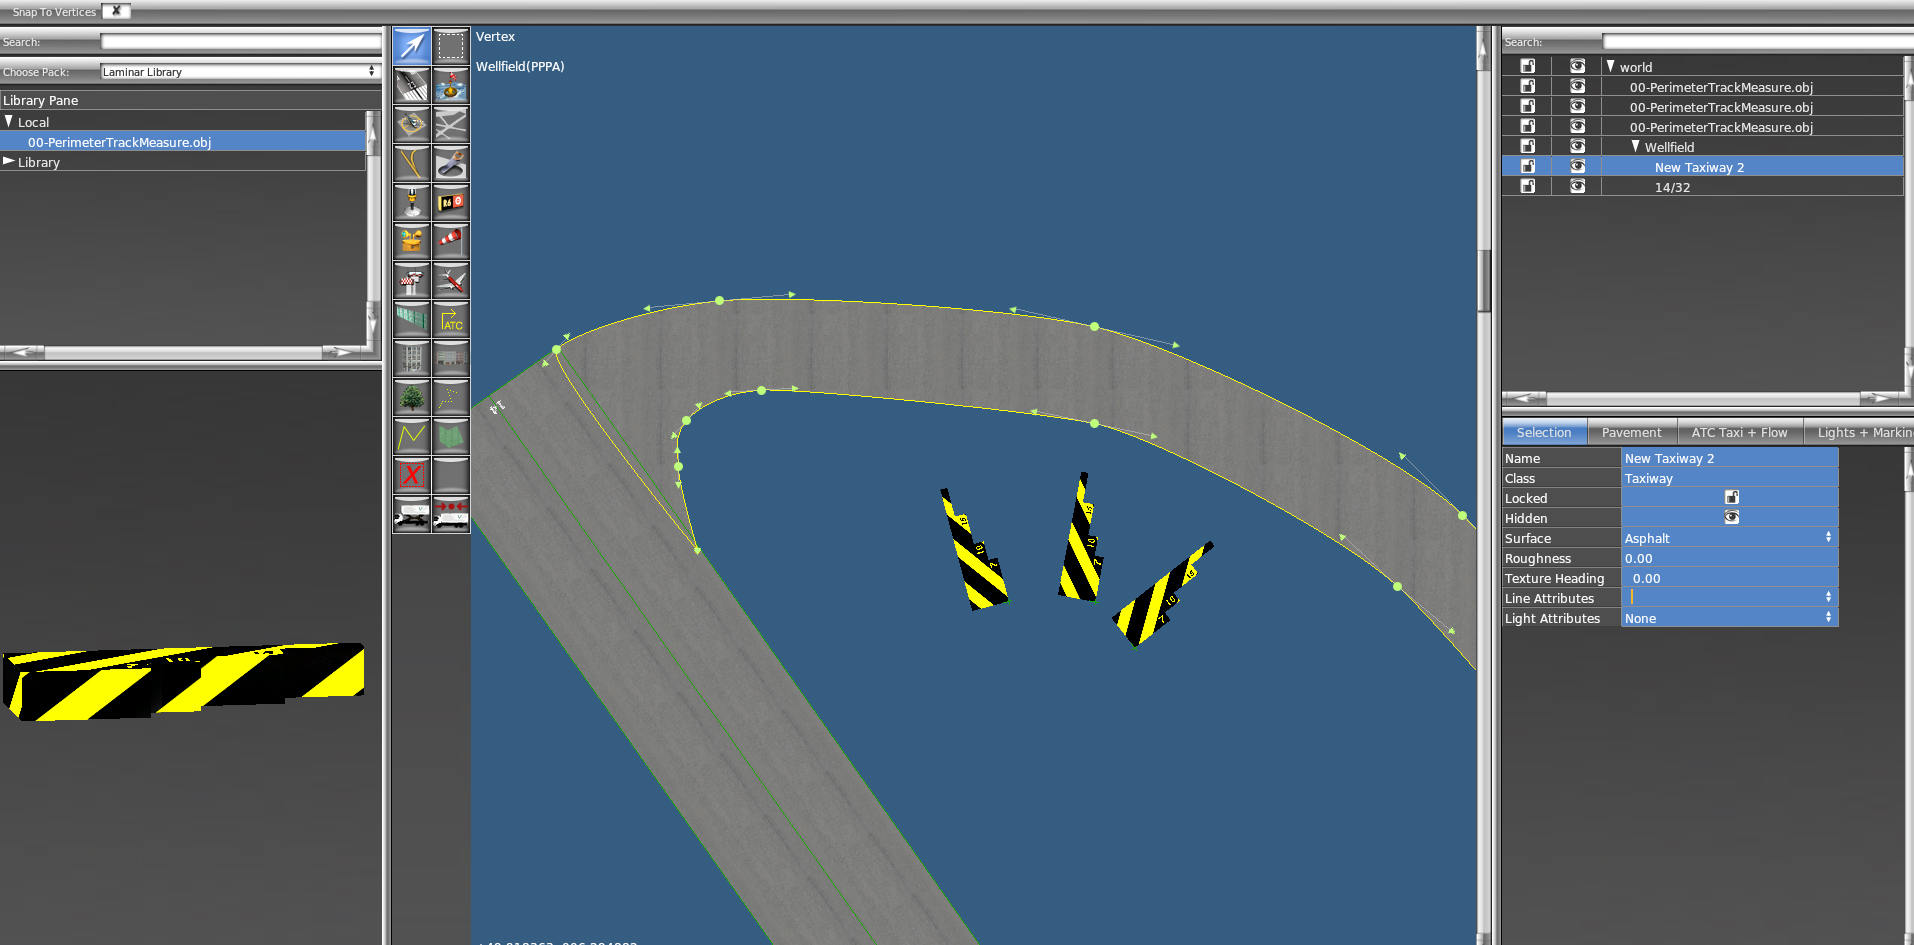
Click on the taxiway and use the alt
key + mouse button
to drag out the arrows from each taxiway point to draw out a curved
edge. You will notice that one direction will form a curve and the
other direction will loop the edge. A bit of practice will
soon
give you the idea. Longer arrows give wider curves.
These
curve arrows can be directed independently. Remember to delete the
width templates or drag them around to use for drawing other taxiways.
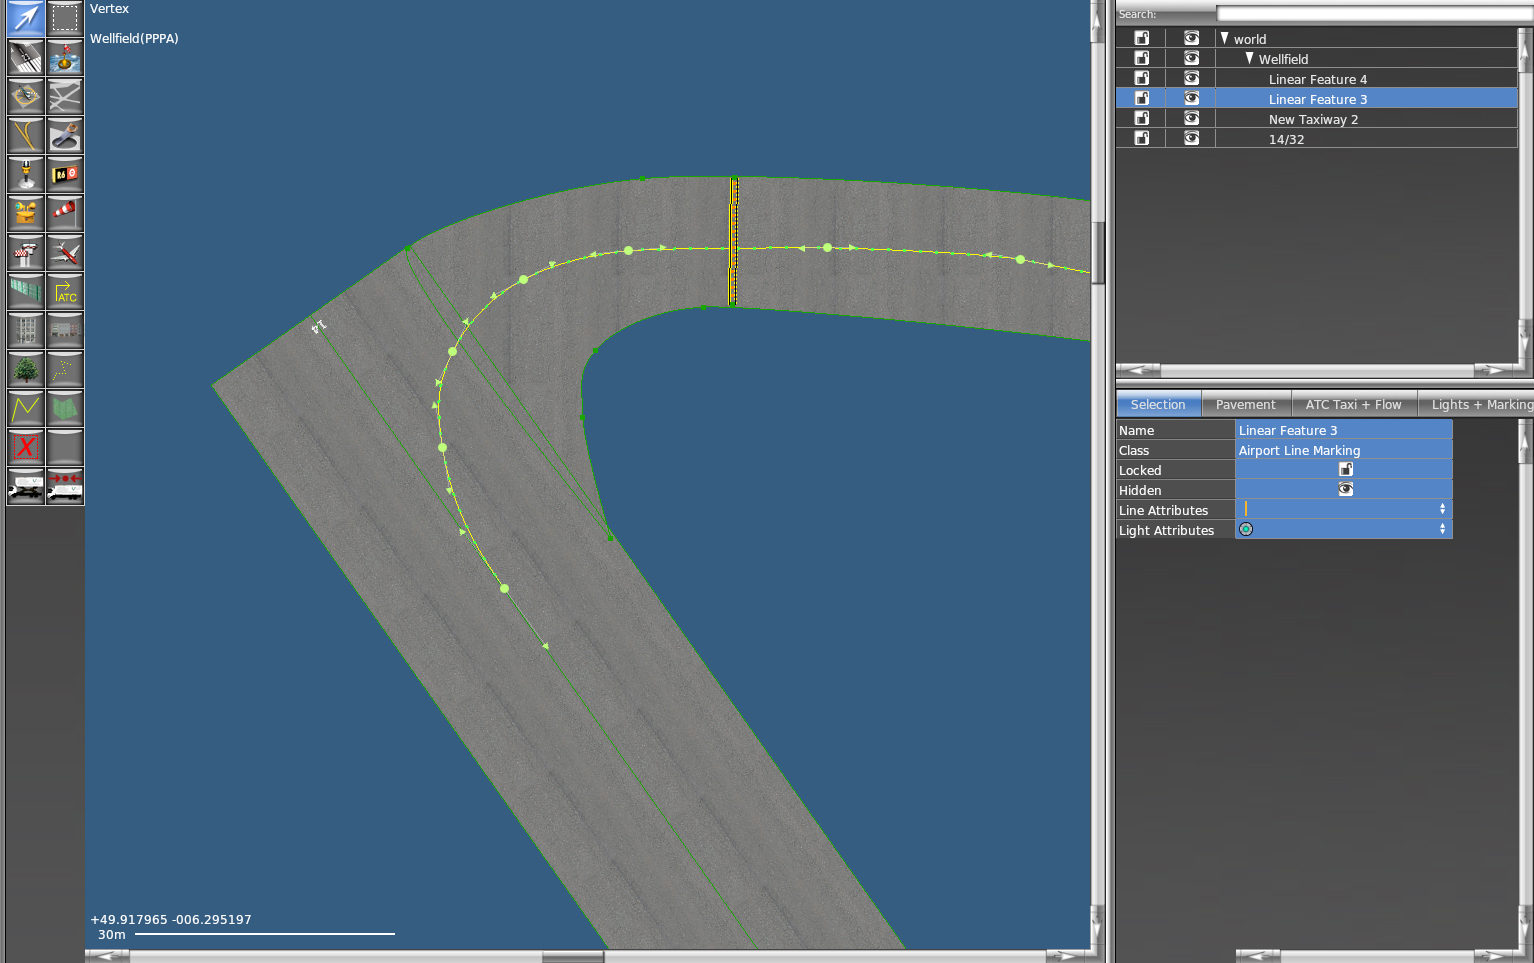
Using
the line editor, a taxiway line can be added - use the same technique
to smooth out the curves for the line. Add a solid
yellow
line and a taxiway centrelights in green. The line tool can
also be
used to add a runway hold line and amber lights. Place an aircraft at
the end of the runway and check on the Flight Sim that the taxiway and
taxi lines look correct.
Top
Tips
I
use a line tool to mark out the position of the taxiways before I
draw them. The line usually follows the centreline
of the
taxiway and will be deleted when the taxiway proper is in place, before
I add the yellow centerlines.
If you are modelling a dissused
taxiway make sure that there are No Entry sign at the end, otherwise AI
aircraft will use the taxiway where
route presets are not used. Better still, model the taxiway as a
normal polygon - then there are no keys for AI to go there.
Taxiways with multiple surfaces will
need to be assembled in sections. Name them the
same,
but add A, B, C, to the name to identify the sequence of sections.
In some cases, marking polygons can be overlayed to represent
patching and wear.
Group all of the taxiway components together to make finding and
editing them easier.