Setting the parameters for taxiroutes can cause some issues if the rules are not followed. This is a simple guide to marking out taxiroutes using WED. When ATC is controling AI on the airfield, it only sees the marked out taxiroutes. If there are none, then XP sets up a default set of taxiroutes which may pass through parked aircraft and hangars (as they are invisible to AI).
All airfields have hot zones and cold zones. The hot zones are what the taxiroutes define, to ensure that only one aircraft is engaged with the active runway at any one time.
Mark out the runways first when setting up the taxiroutes.

The runways should be marked out with a blue zone as shown above. This small airstrip only handles aircraft at size B. The aircraft size can be specified depending on the wingspan of different types from A (C172) the E (very heavy metal). The taxiroutes do not go to the end of the runway, but join with the red lines at a node from the hold line.
Do not tick One-Way as aircraft can taxi in both directions depending on which runway is active. Specifying the runways for Arrivals and Departures will hold other aircraft off of the hot zone when it is occupied - from approach to departure. Where there is an ILS hold - to prevent aircraft from interfering with the signals - that can be used independent of the runway if required.
Mark out the Approaches to the runway next.
This includes taxiways from the runway hold to the runway and any sections of taxiway that is intermediate between active runways.
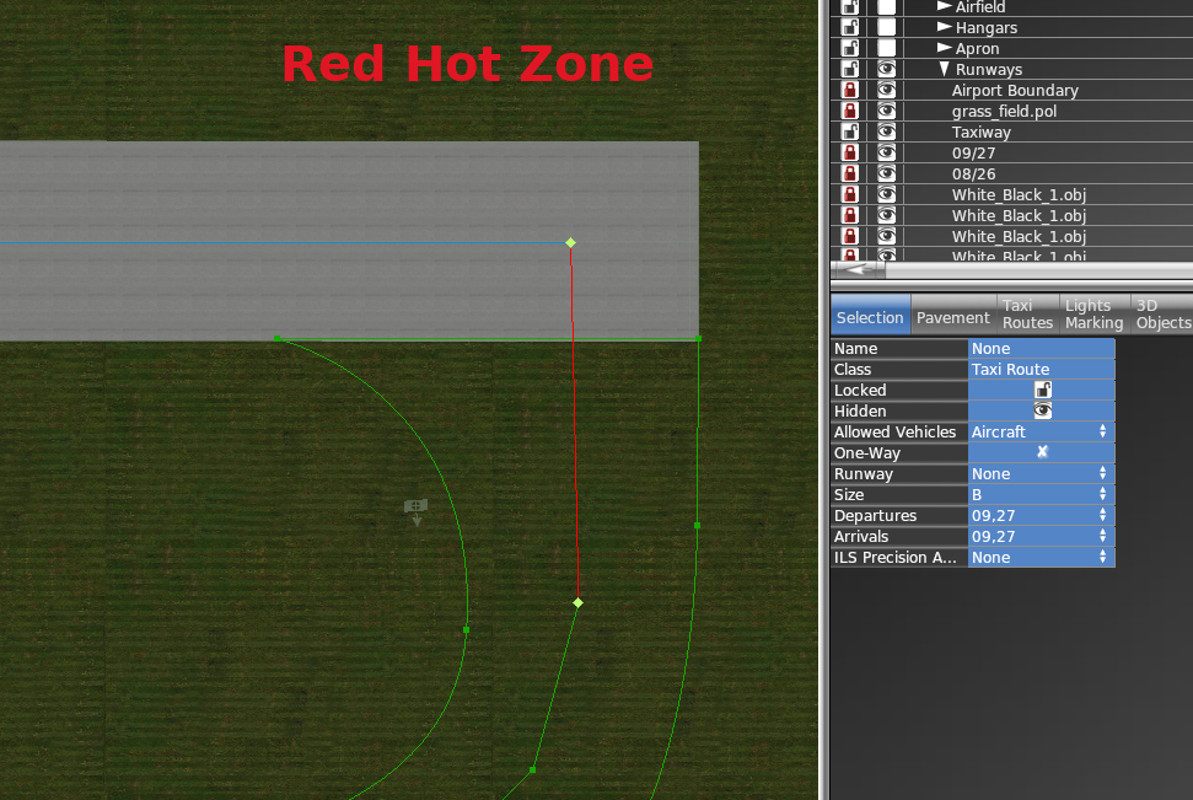
The space from the runway hold to the runway centre line is a hot zone area.This is also a taxiway area that takes 2 way traffic. This zone is not on the runway, but it needs to recognise the active runways that apply to the hot zone. Here there is one runway, so two potentially active approaches or departures. Where 2 runways cross, you will need to account for both runways being active in the hot zone.
The next job is to add normal taxiway routes - These are also potentially 2 directional routes that need to form a loop around the relavent runways, or join the runway holds at appropriate places.
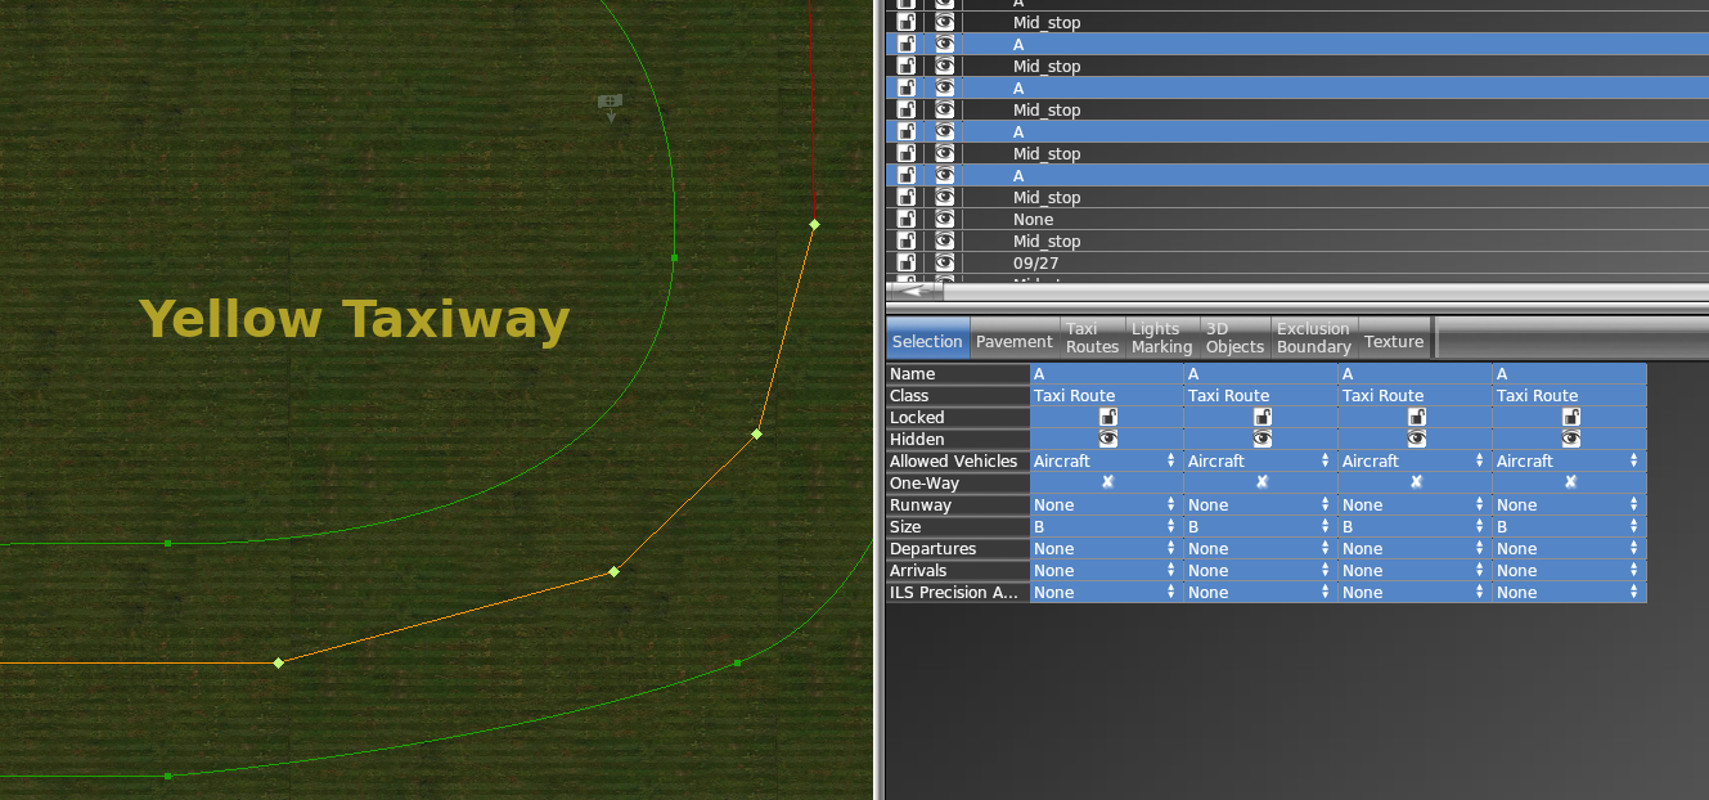
The nodes need to follow the taxiway to keep the aircraft away from the edges. Nothing needs to be specifies along these routes as they are outside of the hot zone. The exception is the maximun size of an aircraft that can use the taxiroutes. At this airfield the aircraft size is always going to be B - from a DHC1 to a small business jet.
Notice that the Taxi Route Name is A. ATC will refer to this taxiway as Alpha. You can adapt your taxiway sections by specifying the name of each section.
Then we get into One-Way taxiroutes.
Where there is a ramp with an AI aircraft on it, the aircraft is going to taxi out directly to the nearest specified taxiroute. It does not matter what is in the way to AI, which will happily taxi an aircraft through a building to hit the nearest taxiroute - so you need to put in normal taxiroutes and one-way taxiroutes to controll the flow of traffic near ramps
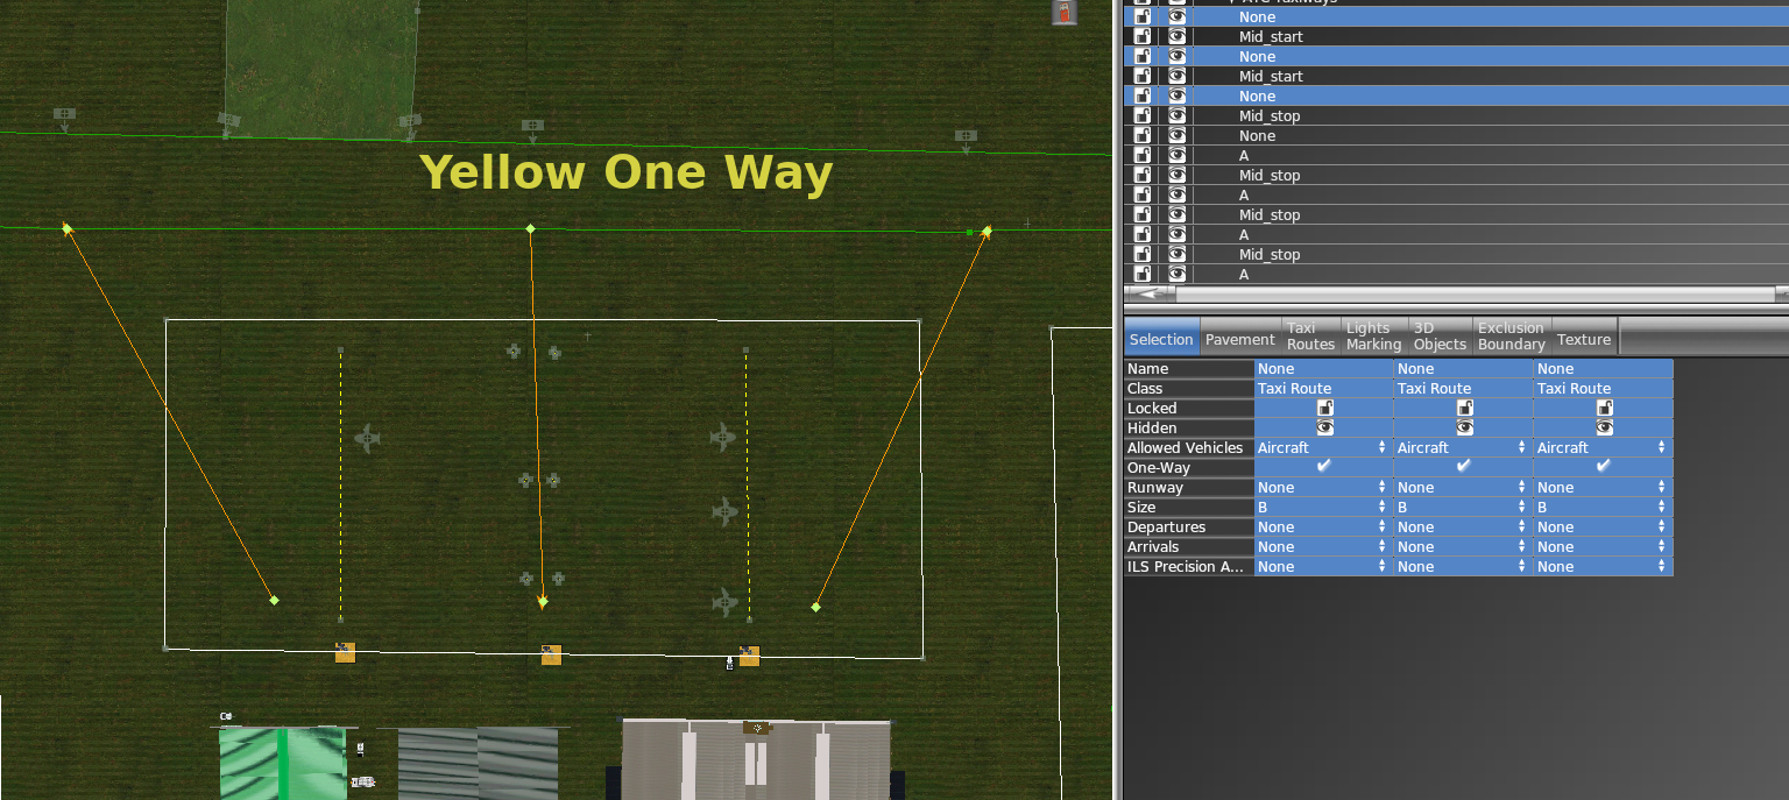 .
Here, you can see three one way taxiroutes. The central one is from the taxiway loop to the area at the end of the ramps. The other two are outbound from the ramps to the taxiway loop. The lines are created by clicking on the start node and ending on the direction arrow node. That gives the direction when One-Way is ticked. AI will follow this route patern and go to the correct ramp, or depart from the ramp to the nearest route.
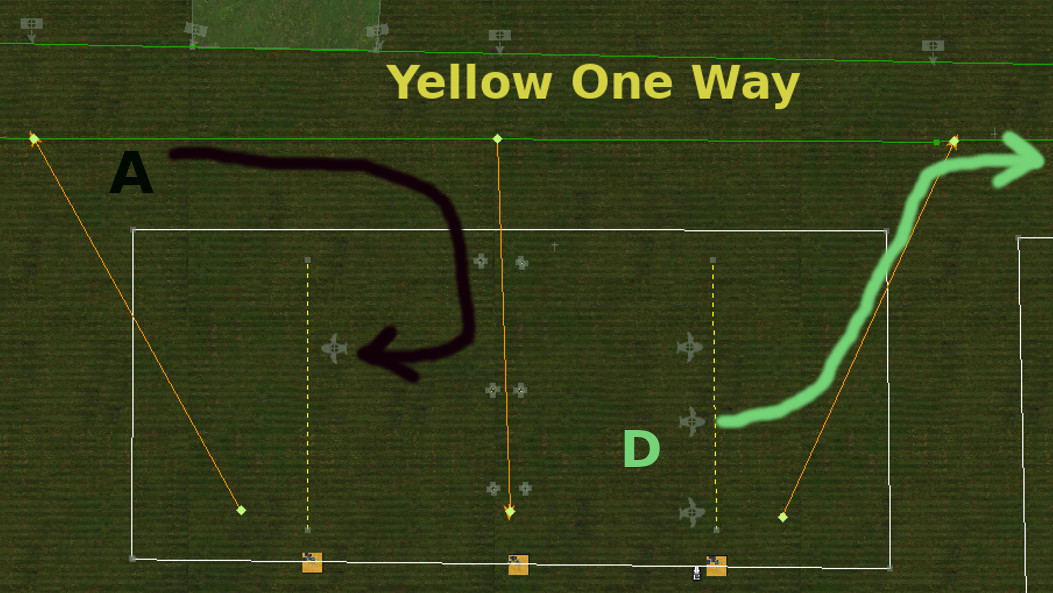
A - shows the route that an arriving AI will follow to ramp 3.
D - shows the route a departing AI aircraft will take from ramp 5.
Notice that ramps 1 and 2 are not shown. These ramps have scenery aircraft parked in them and therefore cannot be used for AI or sim flying, so they are excluded as active ramps.
When the active runway is changed, the AI will turn in and out
of the ramps in the other direction, as required to travel to the
different active runway. That is why the main
taxiway loop needs to be two directional.
NOTE: Where there are multiple ramps around a terminus building, you will need a loop that passes at an appropriate distance from the ramps to give wingtip clearance for taxiing aircraft. That loop does not have to follow the ground markings exactly but they do need to be present to stop aircraft passing through the terminus.
Right angle joins are OK. AI can see angles and put in a curved path for most aircraft to take.
Multiple nodes are needed where a taxiway has a curve where you do not want aircraft to go off of the taxiway. Multiple nodes are also needed where you have two nearby taxiroutes where aircraft can pass each other in close proximity in different directions.
Final check.
Click Select on the menu bar.
There are 3 checks you need to do before finalising and
locking your taxiroutes.
|
Select Degenerated Edges Looks for zero length ATC route sections. If you have any, they need to be deleted. Select Double Nodes Looks for any nodes that have not been merged. If they are left unmerged, AI will stop moving at that point. All nodes need to be merged to allow free flow. Select Crossing Edges Looks for any taxiways that cross each other without a joined node. These nodes need to be inserted and merged. |
.