However, This does not account for regional variations and styles of runway markings for many small or unlicenced airfields. Both X-Plane default and the gatway options rely on the standard runway set.

The runway above shows the gateway default for SBPV, Porto Velho International in Brasil. The runway texture and markings are standard for many runways. These markings can be redone to represent the real world runway by using layered polygons to define the runway texture and markings. This is a simplifiaction of the method used to do this.
Create two polygons - one for the runway surface texture and one for the markings.
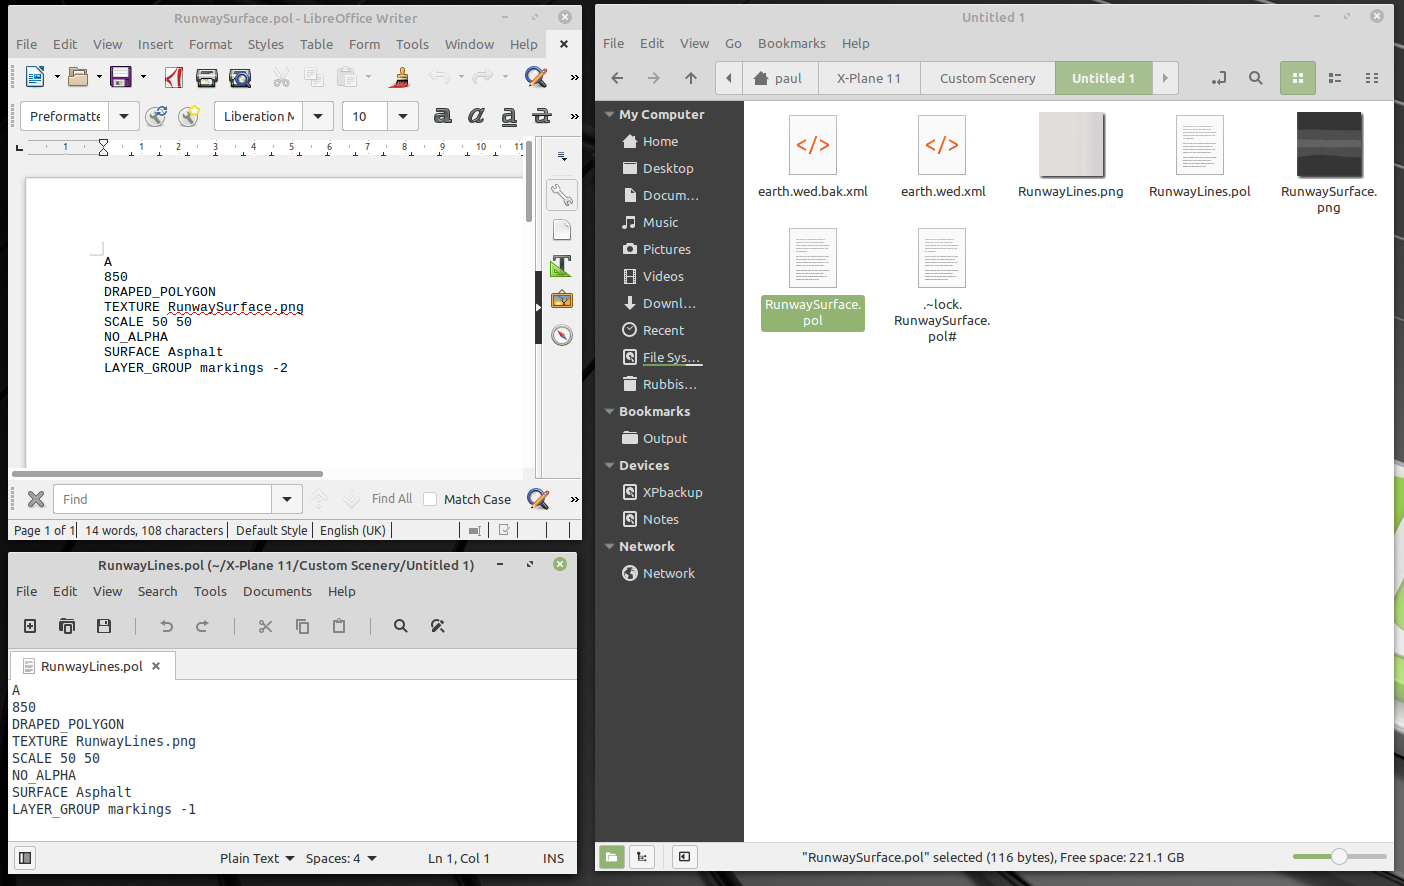
These are shown shown as text.pol files with associated image.png files set to 1024x1024. The runway surface layer is set to markings -2 and and the markings layer is set to markings -1. That will mean that any taxilines and other custom markings will sit above the runway markings during scenery development.
Using WED and setting the view to slippy maps/ESRI, the runway can be placed over the location of the ground image runway.

When setting up the runway, set none for all markings, but set up the lights, approach and distance markers as required. This will give all of the runway properties that are required by the sim and the visible runway surface can then be covered by your custom surface and markings.

A good idea now is to move the runway to one side and cover it with the surface texture polygon. You can then place the runway markings polygons over the ground image to cover the visible markings. Here, I have added 3 dashes of the centreline and some of the bars on the right side of the runway as well as a library number for runway 01.
The runway and runway surface can then be re-positioned and the markings will sit above the surface as they are at a higher level in the scenery layers.

The runway number, two centreline dashes and the right hand precision bars are seen here. The runway surface image is orientated in line with the runway, though it does show a thin white edge on the image which needs removing and the colours have not been diffused across the image - more work to do there.
Selected texture polygons for the markings can be highlighted in WED and duplicated to another area of the runway. This makes setting out the markings much easier. If you design other polygons to add blocks of markings as a single image on a transparent background, you will require more types of polygons, but fewer applications of texture - cleaner code, but more image files. The savings on load time are minimal, but more graphic images makes for a larger file size.
TOP TIP: Take your time and make a backup at each stage of the work.